Microbiological studies routinely confirm a jarring reality: the average desktop computer keyboard harbors between four and twenty times more bacteria per square inch than a standard household toilet seat. Over months of typing, snacking at your desk, and natural dead skin shed, your beloved mechanical keyboard becomes an unintentional trap for dust mites, biscuit crumbs, pet hair, and oily sebum transferred from fingertips to keycaps.
While membrane office keyboards are easily replaced for fifteen dollars, an enthusiast mechanical keyboard—often costing anywhere from $100 to $400—is an investment in precision engineering. Aggressive or careless cleaning techniques (like spraying harsh bleach solutions, submerging PCB circuit boards in water, or yanking keycaps with cheap plastic pullers) can scratch custom keycap profiles, snap delicate switch stems, and short-circuit hot-swap sockets. Here is the step-by-step, safe restoration ritual.
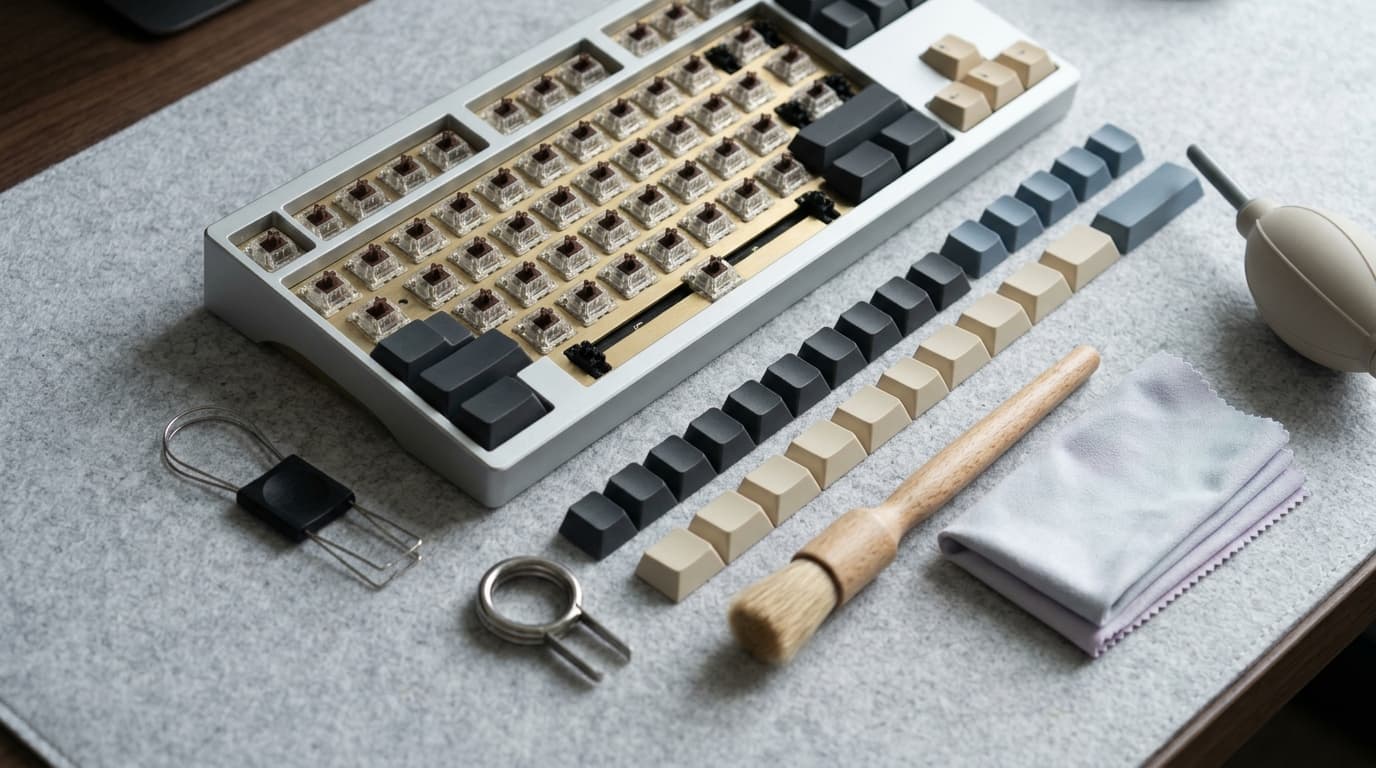
Essential Cleaning Tool Kit
- Wire Keycap Puller: Never use cheap plastic ring pullers (they scratch keycap sidewalls). Use a dual-wire puller that loops gently beneath keycap corners.
- Bowl of Lukewarm Water with Mild Dish Soap: Breaks down finger oils and grease without damaging polymer plastics.
- Microfiber Cloths & Cotton Swabs: For lint-free wiping.
- Isopropyl Alcohol (IPA 90%+ or 99%): For cleaning the aluminum/brass switch plate and electronic contacts (evaporates instantly with zero moisture residue).
- Soft-Bristle Makeup Brush or Electric Duster: For dislodging loose debris between switches.
Step 1: Disconnect and Photograph Your Keyboard Layout
Unplug the USB cable from your keyboard completely (or toggle off wireless Bluetooth/2.4GHz power switches). Take a high-resolution top-down photo of your keyboard with your smartphone. Even seasoned typists can get confused when reassembling less frequent keys—like the navigation cluster (Home, End, Page Up, Page Down) or punctuation symbols.
Step 2: Safe Keycap Extraction
Slide the dual-wire puller diagonally over a keycap until the wires click beneath the bottom edges. Gently pull straight upward with steady, vertical pressure. Never wiggle or torque the keycap horizontally, as this can snap the cross-shaped stem of the mechanical switch underneath. Pay special attention to stabilized long keys (Spacebar, Enter, Shift): pull gently from both sides simultaneously to avoid popping wire stabilizer clips.
Step 3: The Soapy Warm Water Bath for Keycaps
Drop all plastic keycaps into a bowl of lukewarm water mixed with a few drops of grease-cutting liquid dish soap (like Dawn). Swirl them gently with your hands and let them soak for thirty minutes. Finger oils and surface grime will dissolve completely without scrubbing.
Critical Temperature Warning: Never use boiling water or a kitchen dishwasher to clean keycaps. ABS plastic warps at 60°C (140°F), and even premium PBT plastic will distort under extreme dishwasher drying cycles, permanently ruining your key alignment.
Step 4: Deep Cleaning the Switch Plate
With keycaps removed, you will reveal the switch plate. Invert the keyboard over a trash bin and tap the back gently to knock out loose crumbs. Use an electric duster or soft brush to clear hair and lint between switch housings. Dip a cotton swab in 99% Isopropyl Alcohol and meticulously wipe down the metal plate between switch columns. IPA dissolves sticky coffee or soda splatters without harming electronics.
Step 5: The Drying Protocol and Reassembly
Rinse the soaked keycaps under cold tap water in a kitchen colander to wash away soap residue. Spread them face down on a clean, dry microfiber towel. Let them air-dry completely for a minimum of 12 to 24 hours. Verify that zero water droplets remain trapped inside the cross-shaped stems before pressing them back onto your switches.